Monday, October 31, 2011

Thanksgiving Card Take III

     Today I am back with another Thanksgiving card.   As I mentioned in my previous posts, my goal this Thanksgiving is to make 6 different cards using some of the same elements.  I am also trying to incorporate some of the Stamp-A-Faire Challenges. My first card had a front cover cut back by a 1/2  inch. My 2nd Thanksgiving card was one I submitted for PTI"s October Blog Hop.  The elements I kept the same for today's card was the pumpkin, Mat Stack #1 and kraft cardstock. The challenge (Stamp-A-Faire #6) was to use notches with the ribbon.

      I inked the doily with Sepia ink.  The pattern paper is from the First Fruits Collection. Tying the ribbon took forever.  I had to watch Dawn's McVey's tutorial several times. It took me a dozen times before I was able to get the bow the way I wanted. (Okay part way)


     I have two other Thanksgiving cards finished that I'll be posting in the next day or two.  Thank you for stopping by.

Supplies: CS: Kraft, Orange Zest, Ripe Avocado, Dark Chocolate
Die: Mat Stack 1
Other: Sepia ink, ribbon, doily, pearl

Saturday, October 29, 2011

MIM #38 Brayer & Impression Plate Techniques

  This week's MIM for Papertrey Ink is about using a brayer to apply color to the texture made using an impression plate.  You can learn about it here. I decided to make an anniversary card for my sister-in-law who is celebrating her 40th anniversary in early November.
  I chose PTI's Cane Print impression plate and used Momento's Pear Tart. I visioned the Cane Print to be a trellis with flowers climbing along it. Here's my interpretation.


     The flowers were made from combining the top layer of Bloom Builders #3 with the newest Flower Fusion die #9. I fussy cut the leaves from the Flower Fusion #9 stamp set.

     Thanks for looking.

Supplies: CS: PTI: Select White, Ripe Avocado, stash on hand: purple & brown
IP: Cane Print
Ink: Memento: Pear Tart; Archival Ink, Sepia
Die: Bloom Builder#3, Flower Fusion#9
Stamps: Flower Fusion #9, Fillable Frame #4
Other: Orange Zest Button, White Twine

Tuesday, October 25, 2011

PTI' S October Blog Hop

 
Well, its blog hop time again.
You can find all the details and participants on
Nicole's website.


I loved the inspirational  picture this month.


When I first saw this picture, I knew the cream pumpkin with the orange design was going to be my focal point along with the polka dotted fabric.


 I created the pumpkin by cutting out 3 ovals using my Wishblade. I stamped the design with the Flower Vine Stamp set from Denami. The vine is a 1/4" curled up strip of paper. Dimensionals were used to prop up the pumpkin.

My card. 

Originally, I had used the Orange Zest grograin ribbon. It looked fantastic. However, it was a bit too wide and not appropriate for mailing.  Not having the twill, I settled for a non PTI ribbon that coordianted with the orange zest.

Thanks for looking.

Supplies: Paper: PTI Kraft, Bitty Dot Basics
Stamps: PTI: 2009 Autumn Tags, Denami: Flower vines
Die: Mat Stack 1
Other: ribbon (stash), PTI Avacado button, rustic twine


Monday, October 24, 2011

Masculine Birthday Card

  Every once in awhile someone enters your life who is a gift from God.  That's my son-in-law.  He is a fantastic person.  The type of man every mother wants their daughter to bring home.  There are so many words to describe him: intelligent, loving, giving, strong, considerate etc.  He's both a fantastic husband and an awesome, involved dad. Friday is his 35th birthday.  Here is the card I made for him. I used my favorite color combination for a masculine card: Kraft & Ocean Tide.


  The tag is from Pti's latest release. Decided to notch the top of the tag & wrap some twine around it. The numbers were cut out using my Wishblade.
  Thanks for looking. Be sure to stop back tomorrow to see my submission for PTI's Blog Hop.  The inspirational photo was amazing.

Supplies: CS: Kraft, Ocean Tides, Vintage Cream
Stamps: Botanical Silhouettes, Text types,
Die: Tag Sale # 5
Other: Woodgrain IP, button, twine

Sunday, October 23, 2011

Gratitude

  Today I started making cards for Thanksgiving.  I have about fifteen I need to send out.  Mostly to friends and family. But I also want to send gratitude to the lovely caregivers of my MIL.  My goal is to design 6-7 different Thanksgiving cards.  A thought occurred to me. Keep 1-2 elements the same and try to incorporate Nicole's challenges from Stamp-A-Faire.  I was lucky to attend this wonderful event; so I didn't play along with the challenge. I have been meaning to try them. Perhaps I can kill two birds with one stone.
 Today's card is based on challenge # 8 in which one is to create a card with a front cover that is cut back by an inch or so.
 
    I cut 1/2 inch off the front of my card and cut a strip of pattern paper from PTI's Frirst Fruits Collection.


   The pumpkin is made from 3 ovals I cut out using my Wishblade.  Each section of the pumpkin is edged with PTI's Chai ink.  I die cut the Mat Stack 1 shape using a different paper from the  First Fruits Collection.  I fussy cut the border of the Mat Stack 1 using terracotta CS.

     A close up shot.


     Thanks for looking.

Paper: Pti Terracotta, Kraft, First Fruits Collection
Ink: Chai
Die: Mat Stack 1
Other: Twine, PTI buttons

Saturday, October 22, 2011

Halloween Party

 Today my daughter's MIL had an early Halloween party for all of her grandchildren; 5 in all ranging in age from 5 years to 5 months. Our 2 familes get along real well.  We celebrate most of the holidays together so our children do not have to decide what holiday they are spending what family with. (kwim)
   I decided to make a little bag of goodies for them. I had some large glassine bags that I sprayed using Krylon's black webbing spray.  Then I stamped spiders all over the bags.  Each bag had a Happy Halloween label edged in black ink.  Very quick & simple.


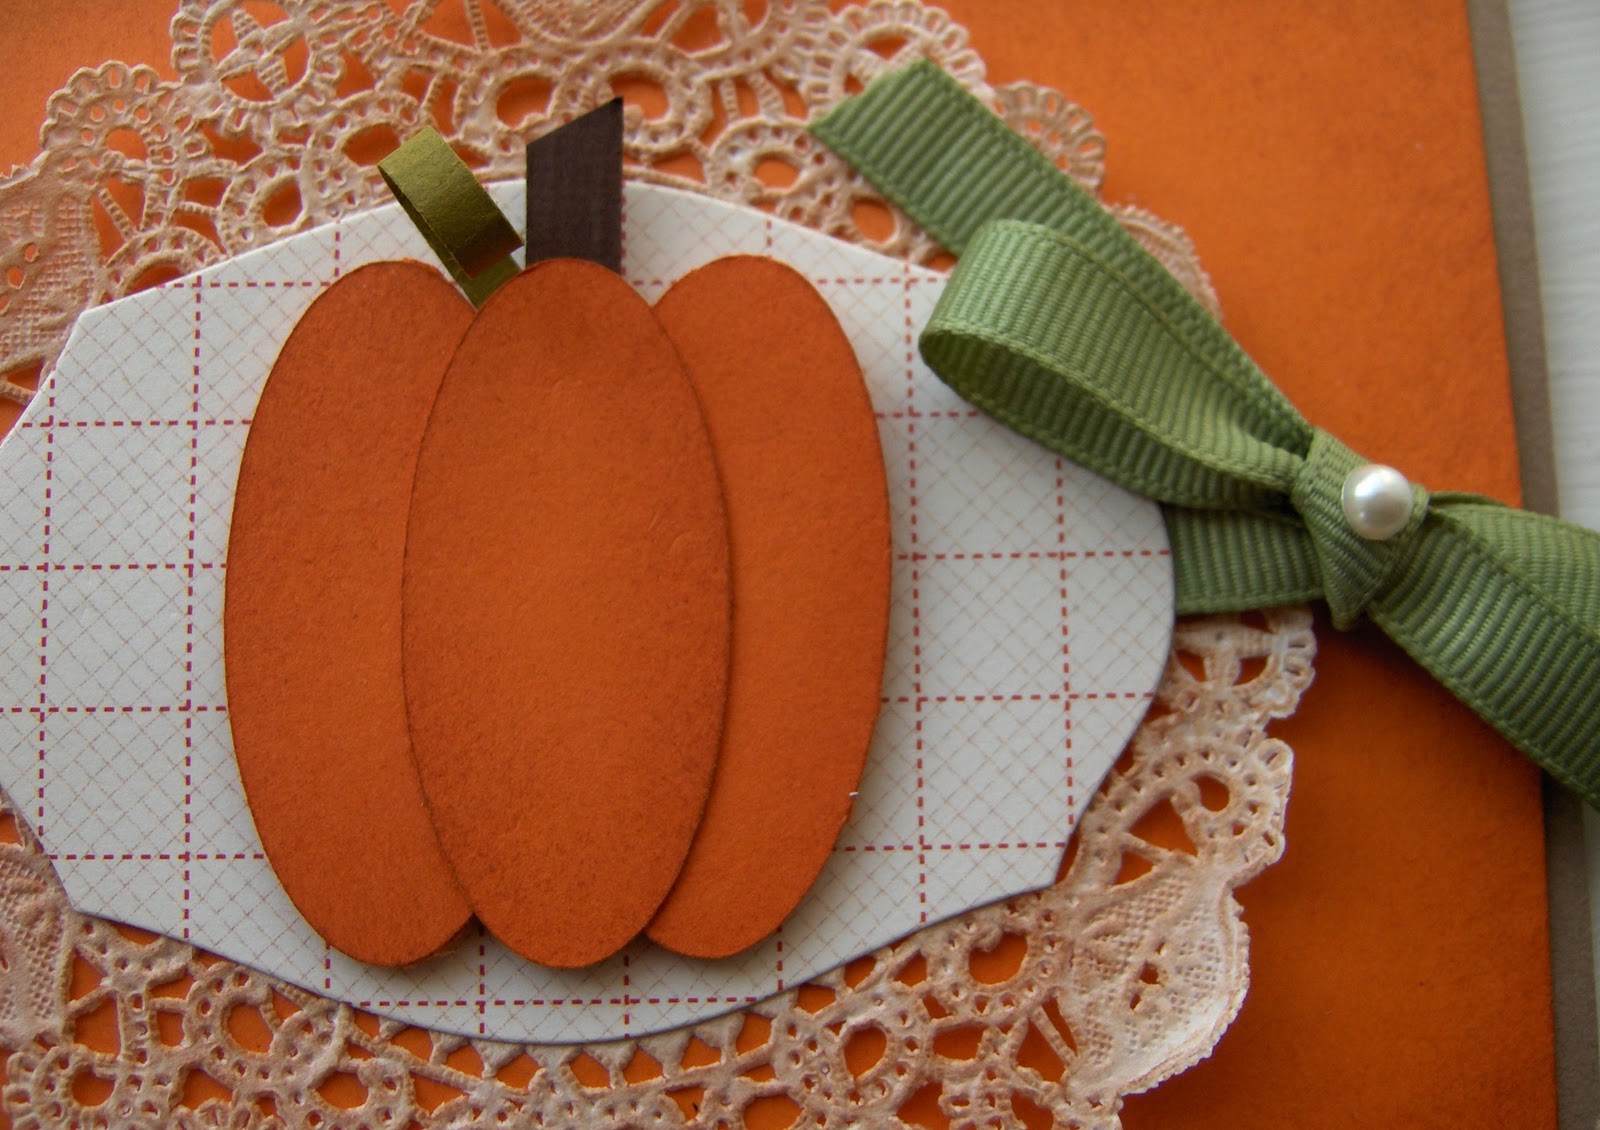
    These were the goodies that were placed in the bags.  Those pumpkin cookies are Cincinnati's pride backed by Busken Bakery.  When the company first began making these yummy cookies, they were available in only 1 size; a nice large one.  Being so popular there are now 3 sizes: the small ones (seen here), a large cookie and a skinny one.  Being these were for "little ones", I decided to go with the small size.


 A bag full of goodies.
   The kids had a great time.  There were lots of activities to keep them busy.  The first activity was making a placemat. The good old Cricut machine came in handy for cutting out a variety of Halloween shapes, the kids could place on their mat.  My daughter prepared the cutouts.
      After the craft, it was time to get the younguns' up & moving. You can only keep little ones sitting for so long.  I had gone to the Dollar Store and bought two bags of plastic spiders, bat, scorpions & skulls.  We hid them in plain sight so the kids could find them.  They loved this activity so much, we did it a second time.  Then it was time for bowling.  We had 5 pumpkin buckets turned upside down that the kiddies could roll the ball towards to knock the pumpkins over.  The 2 oldest did a great job taking turns.
   My favorite activity was the Halloween windsock.  This one the kiddies needed a lot of help with.  We had different shapes for the kids to glue on the orange plastic cake plate. Four holes were punched on the top & bottom rims of the plate.  For the fringe, black plastic garbage bags were cut into 1 inch strips.
   By this time the kiddies were hungry, so it was a lunch of grilled cheese sandwiches and apple slices.  Dessert was this spider cupcake.

  My grandaugther Olivia (3) was Snow White; her favorite Disney Princess.

     Lilly (14 months) was Tigger.  For Halloween she is going to be a bumble bee.

 A group shot. (Minus the 5 month old) 

     Do you know how hard it is to get a group shot of little ones?  
     Looking forward to Halloween next week.  I know these little ones are too! 
    Thanks for looking.

Friday, October 21, 2011

A Little Late, but Still In Time

     My title is an oxymoron.  Let me explain. Back in September Erin Lincoln did a Make it Monday segment on thick chipboard accents.  She explained how you make your own chipboard using a die and cardboard. (MIM#34)  I was so excited to play along with this challenge. I had decided to make a Christmas card using my Christmas Tree die I purchased last year, but rarely used. I made the chipboard tree; easy peasy. Then life got in the way, and I missed the deadline for the challenge. Earlier this week, I had time to finish the card. This is what Icame up with.
     The berries are from Harvest Berries.  I used a punch for the snowflakes.  Added some bling.
     By this time I received the Holly Jolly die, so I decided to place some holly by the button.
     Well, I may be late for the MIM#34 challenge, but this card is in time for Christmas. :)
Thanks for taking the time to look.

Supplies: PTI CS: Pure Poppy
Ink: PTI: Fresh Snow, Memories: Black
Die: Holly Jolly, Christmas Tree, Harvest Berries
Stamps: Christmas Label
Other: snowflake punch, ribbon, PTI button, rhinestones

Thursday, October 20, 2011

A Perfect Pair

     Have you ever made a card and it turned out completely different from the idea you first began with?  That happened to me with this card.  My sister and her husband celebrated their 37th wedding anniversary yesterday.  (Happy Anniversary, Jo-Ann & Eddie.  I hope you received your card on time)
    They make a wonderful couple.  After 37 years they are still in love. Afterall, they are the perfect pair.  Awhile back I had stamped  the image of a pear using a water color technique. I knew that the pear would be the focal point for this card.  However, I had planned to use some terracotta cardstock cut with my Half & Half die. As I was arranging the layout I had sketched, the card was not appealing to me. I scrapped my original idea and ended up with this.  It turned out much simpler than planned.

     Seems like the only thing I used from the Half & Half set was the sentiment.  Although I like the way images turn out misting a stamp containing several colors of inks, it is a very messy technique.  If one uses too much water, the paper can curl.  The pear was fussy cut & propped up with dimensionals.
     A close up of the tiny tag tied with PTI twine.

     I generated the inside sentiment with my computer. Then I used the Mat Stack #3 die to cut it out.
The inside & outside of the card was sponged using Peeled Paint distressed ink.
     Thank you for taking the time to look.  All comments are appreciated.

Supplies:
CS.  PTI: Vintage Cream, Ripe Avacado, Spring Moss
Inks: Peel Paint Distressed Ink, Memories: Black
Stamps: PTI: Half & Half; A Stamp In the Hand: Pear
Dies: Mat Stack 3, Tiny Tags, Love Lives Here
Other: PTI twine, dimensionals

Tuesday, October 18, 2011

Simple Thank You

     I needed a simple thank you card to send to my son. Masculine cards are a challenge for me. I knew flowers wouldn't work. Neither would half the stamp sets I own.  Also,  I wanted to use a set that hadn't received much 'ink time'. I've used the small image from Harvest Berries many times, but never the large branch of ginko leaves. It worked perfectly as a solitary image.

     To add some depth and interest, I scored a framed around the leaves, and added the felt bird.  Three of the ginko leaves are propped up with dimensionals.  A simple sentiment finished off the card.

     I like to continue the theme inside the card. 
    
     It was an easy card to create. Simple.  Thanks for looking.

Supplies: CS: Select White
Ink: Memento: Pear Tart
Stamps: PTI: Harvest Berries, Hero Arts: Dainty Thank You
Other: Harvest Berries die, Simple Chartruese button, white twine, PTI felt, dimensionals

Monday, October 17, 2011

MIM #37

  I haven't participated in a MIM for several weeks. Always a reason; no time, supplies, or interest. Pick one.  However, today I was home feeling a little bit under the weather with a cold cleaning up my stamping room when I came across some leftover Halloween supplies.  So I decided to use them for the MIM Challenge #37.  Actually this card came together very easily having both the supplies and a general idea.


   A close up of the tag. The tag was one I had already had made using my Wishblade.


     Thanks for looking.  I promise this is my last Halloween card for 2011.

Supplies:  CS: Orange Zest, Stampers Select White
Stamps: Northwoods
Ink: Memories black
Die: Limitless label
Other: label, PTI Black gingham ribbon, orange zest button, PP, black gingham ribbon

Saturday, October 15, 2011

Cute Calories Don't Count

    I recieved a birthday card with this saying earlier in the month.  Right away I knew I wanted to make a birthday card using it.  I generated it with my computer before using the Christmas Label Die from PTI. This has become one of my favorite label dies since receiving it last month.
     Since I had to have some "cutesy" sweets, I knew exactly which stamp set I was going to use: Hero Arts Cupcakes.  This is one of my favorite non PTI stamp sets.  It is one I usually reach for when making birthday cards.  I love all the cute cupcakes in this set.


     In addition to being cute, I wanted the cupcakes to be colorful. I used my copics to color.  Then I dabbled each cupcake with glue using my Zig Glue Pen before adding glitter. I used one of the decorative stamps from the Half & Half set to serve as a cupcake holder.


     The inside sentiment was complied from 3 of the sentiments included in this set. The little purple cupcake is from stampendous. Being an inch it is easy to cut out and put inside of birthday cards.

  This card came out exactly as I had imagined it would.  It is one of my favorites. I'll be sending it off to my sister-in-law who has a birthday at the end of this month.  Thanks for stopping by.

Supplies:
   CS: Lavender Moon
   Stamps: Hero Arts Cupcakes, Stampendous cupcake.
   Die: Christmas label Die
  Other: PP (American Crafts), dimensional, glitter, copics

Friday, October 14, 2011

BOO!

   When I got home from work today, there was enough sunlight for me to take a photo of the last of my Halloween cards. I made a total of 7 different cards this year.  I usually send out about a dozen.  Most likely, I will replicate some of those already made.  Today's card uses the fillable frame #10 die & stamp set from PTI.


      The Ghost is an old stamp I bought several years ago from a company called Holly Berry House. I love how transparent the ghosts are when stamped on vellum.  The spider is a stick stamp sold by the company Stamps by Judith.  Both are the traditional wood mounted rubber stamps.

   Most of the  inside sentiment was generated by my computer.  The Boo was stamped. I have no idea how I came to possess this stamp or who made it.


     I like how this card turned out.  Thanks for stopping by.

Thursday, October 13, 2011

The Witch is Out

     Every once in awhile I'll sketch out an idea I have in mind.  With this card I did exactly that.  However, when actually making the card, it didn't turn out the way I had imaged it.  I had a small image of a witch flying on  her broom with a full moon in the background.  Despite being small, it wasn't a good scale for the tag.
     It's a simple tag card.  The tag is one I made with my Wishblade.  I used a Fillable Frame and PTI's black gingham ribbon.


    A close up of the tag!  As you can see, I sponged some black ink on most of the fillable frame.

     It's my understanding that this card meets the criteria for this week's Colour Q Challenge    
Thanks for looking.  If the sun comes out, I'll be able to take a picture of my last Halloween card.

Wednesday, October 12, 2011

The Witch is In!

   The Halloween stamps used today are from Northwoods. I had terrible lighting when taking these pictures.  The hat was stamped in purple. I used my Tombo markers to color the stars and green band.  I edged the scalloped circle with Memento's Tangelo to soften the starkness of the white base.  The ribbon is from a spool I purchased years ago and never used.  I do believe if you hold onto something long enough,  you'll eventually use it.


     I used my Sakura pen to add a little sparkle on the green swirls as well as along the rim of the hat.
   Still haven't added a sentiment to the inside of this card.

     Please forgive the poor quality of the next photo.  I must have taken 10 shots.  Believe it or not, this was the best shot. (Pathetic)   I made an identical image of the hat in the first card, cut it out and propped it up with dimensionals  upon the image of the witch's shoes . (I only used part of the image from this second stamp)
   I used the same ribbon & background paper in the first card. The sentiment was stamped on a Little Label diecut that was edged with black ink.

     More Halloween cards tomorrow. Thanks for looking.


Tuesday, October 11, 2011

Fillable Frame Frankenstein

     My first purchase of PTI products was in September of 2010. Believe it or not their Halloween stamps did not appeal to me; therefore, I do not own any  PTI Halloween stamps. Since I send a dozen cards to friends & family, I always mass produced one card. So the Halloween stamps I haven't used are limited.   This year I decided to make several different Halloween cards.        
     As I branch out in designing my own cards vs casing cards, I find myself becoming more creative.  For instance, yesterday I showcased a card using the Sending You & Fillable Frame dies for headstones.  Today I used another Fillable Frame (#8) to make Frankenstein.

       I could have done a better job cutting out his hair.  A beautician I am not. Ha!

       The rest of the card is pretty simple.  Haven't done anything on the inside yet.  Need to think of a Frankenstein type message so I can use a font on my computer.

    
     Thanks for looking.  Tomorrow I'll be showing you 2 Halloween cards.

Supplies:  CS: Orange Zest, New Leaf, (purple from my stash)
Stamps: Northwoods
Die: Fillable Frame #8